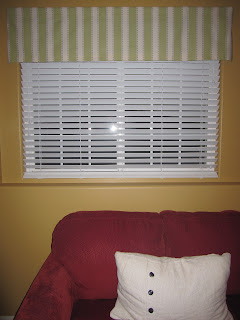
Now that we're back in our house (and I've joined Pinterest), I've been scheming some projects for Keith and I to work on. The first one that I recently finished and want to share with you is a no-sew window valance. I made it for our basement window. I used to have a valance on it when we lived here before but to be honest, it was kind of ugly. I knew I wanted something different so I started looking online. I found a cute one on etsy, but becasuse our window is wider than a standard one, it would've cost me $80. I wasn't willing to shell out that kind of money for a valance, so I decided to look at turorials online to get ideas for how to make my own. I found a few helpful blogs
here and
here. I then shopped online and ordered some really cute fabric for only $5.99 a yard! Here's a pic of my fabric:
Since it has the decorative stripes, I decided I wanted to make a smooth box-style valance instead of a ruffly one. This was a little more challenging, since I had to make sure I make it a precise width and had to piece two sections together. But I think it turned out pretty well. Here's the finished product:
Not bad, right? And the total cost was less than $25! To recap, here's the supplies I used:
- 2 yds fabric (a duck cloth or outdoor fabric works best since it's heavier)
- 1 roll Heat n Bond adhesive (I used the ultrahold variety)
- Scissors
- Iron/ironing board
Once I had a plan and all my measurements, it really was pretty easy to make. If you're sewing-challenged like I am, give it a try. You just might surprise yourself! Be sure to stay tuned for some more DIY projects to come...
Love,
Ashley


Thanks, to great article, that content is very useful for cleaning purpose.
ReplyDeleteBasement Finishing CT